Learn how to add indobase to your web apps.
Head to the Indobase Console.
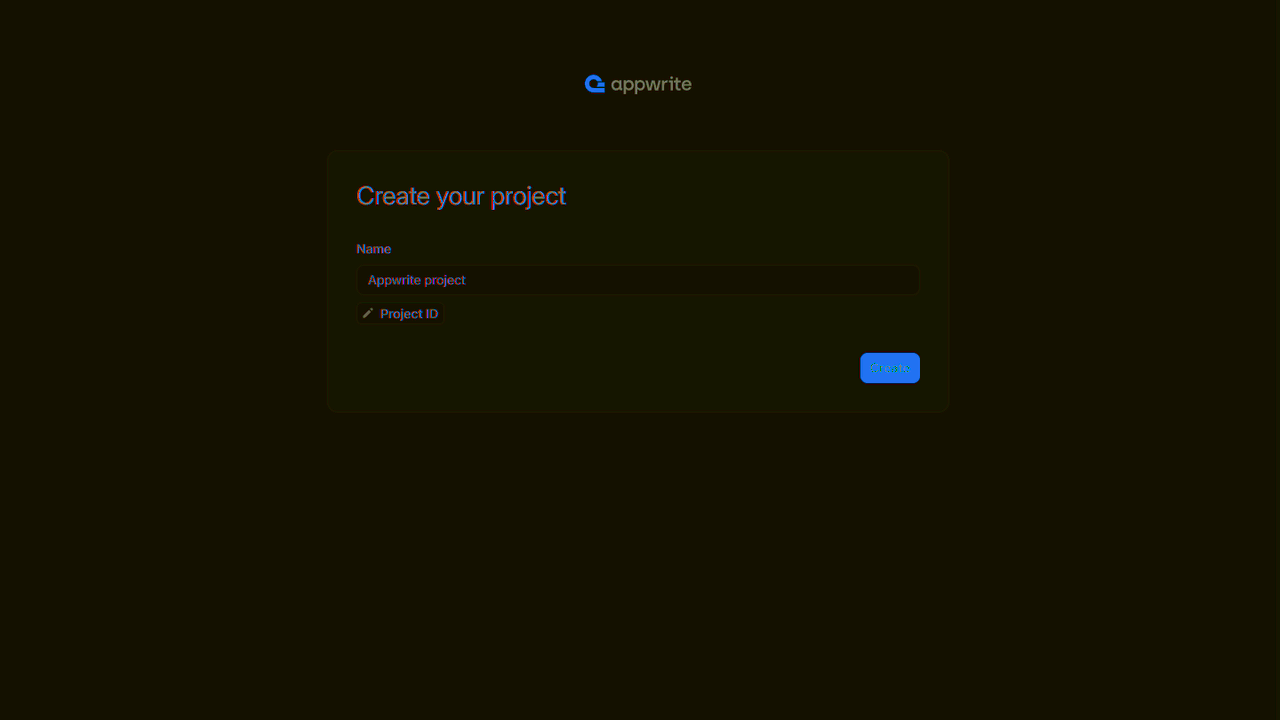
If this is your first time using indobase, create an account and create your first project.
Then, under Add a platform, add a Web app. The Hostname should be localhost or the domain on which you're hosting your web app.
Cross-Origin Resource Sharing (CORS)
Adding localhost as a platform lets your local app talk to indobase. For production, add your live domain to avoid CORS errors.
Learn more in our CORS error guide.
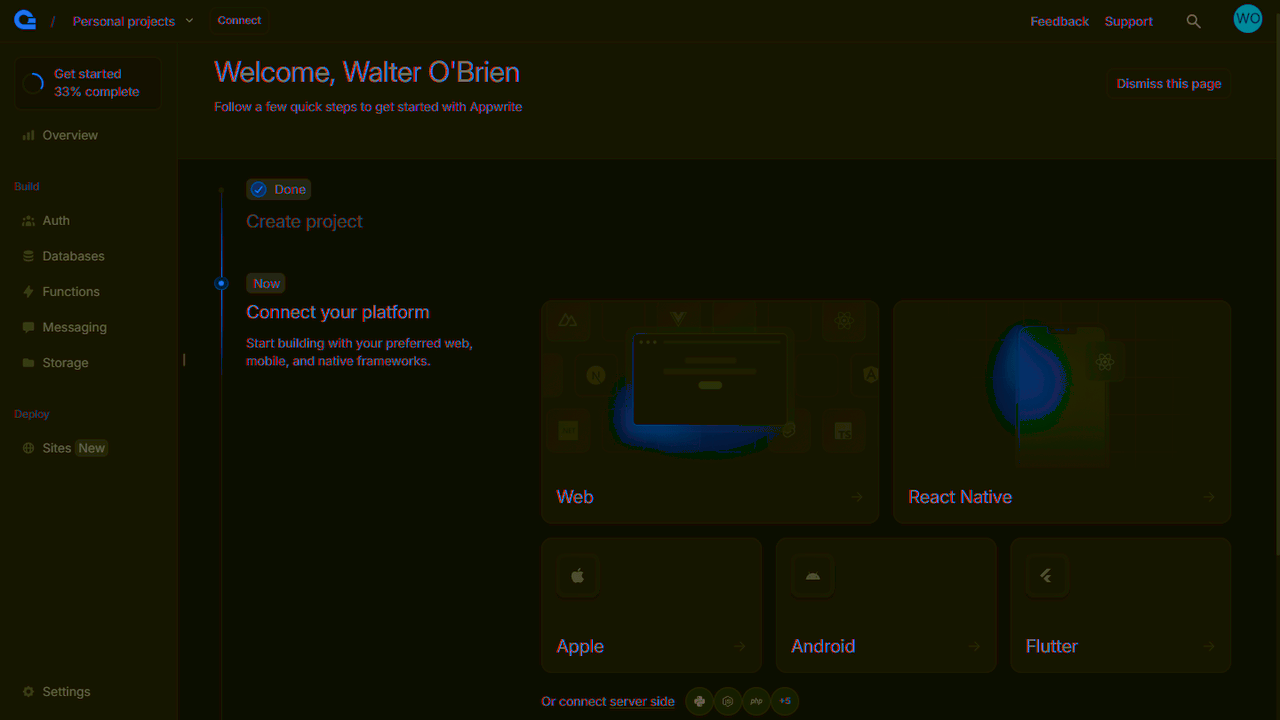

You can skip optional steps.
You can install the indobase Web SDK using a package manager.
npm install indobase
You can also add the indobase Web SDK using CDN by adding a script tag to your HTML file. The SDK will be available globally through the indobase namespace.
<script src="https://cdn.jsdelivr.net/npm/indobase@17.0.0"></script>
If you installed via npm, you can import Client and Account from the indobase SDK.
import { Client, Account } from 'appwrite';

export const client = new Client();

client
    .setEndpoint('https://<REGION>.cloud.indobase.io/v1')
    .setProject('<PROJECT_ID>'); // Replace with your project ID

export const account = new Account(client);
export { ID } from 'appwrite';
If you're using CDN, the library loads directly in your browser as a global object, so you access it through indobase instead of imports.
const client = new Indobase.Client()

client
    .setEndpoint('https://cloud.indobase.io/v1')
    .setProject('<PROJECT_ID>') // Replace with your project ID

const account = new indobase.Account(client)
const tablesDB = new indobase.TablesDB(client)
If you prefer TypeScript, you can import TypeScript models from the indobase SDK.
// indobase.ts

import { Client, TablesDB, Account } from "appwrite";
// Import type models for indobase
import { type Models } from 'appwrite';

const client: Client = new Client();

client
    .setEndpoint('https://<REGION>.cloud.indobase.io/v1')
    .setProject('<PROJECT_ID>'); // Replace with your project ID

export const account: Account = new Account(client);
export const tablesDB: TablesDB = new TablesDB(client);

// You then use the imported type definitions like this
const authUser: Models.Session = await account.createEmailPasswordSession({
  email,
  password
});
Sometimes you'll need to extend TypeScript models with your own type definitions.
For example, when you fetch a list of rows from a table, you can define the expected structure of the rows like this.
interface Idea extends Models.Row {
    title: string;
    description: string;
    userId: string;
}
When you fetch rows, you can use this new Idea interface like this.
const response = await tablesDB.listRows({
    databaseId: ideasDatabaseId,
    tableId: ideasTableId,
    queries: [Query.orderDesc("$createdAt"), Query.limit(queryLimit)]
});
const ideas = response.rows as Idea[];
The indobase SDK works with your favorite Web frameworks.
Learn to use indobase by adding authentication to a simple web app.
Next.js
Get started with indobase and Next.js
React
Get started with indobase and React
Vue.js
Get started with indobase and Vue.js
Nuxt
Get started with indobase and Nuxt
SvelteKit
Get started with indobase and SvelteKit
Angular
Get started with indobase and Angular
Learn to use indobase by building an idea tracker app.
Type safety with TypeScript
For better type safety in TypeScript projects, define interfaces and use generics:
interface User {
    name: string;
    email: string;
    isVerified: boolean;
}

import { Client, TablesDB } from "appwrite";

const client = new Client()
    .setEndpoint('https://<REGION>.cloud.indobase.io/v1')
    .setProject('<PROJECT_ID>');

const databases = new TablesDB(client);

// Type-safe database operations
try {
    const users = await databases.listRows<User>({
        databaseId: '[DATABASE_ID]',
        tableId: '[TABLE_ID]'
    });

    users.rows.forEach(user => {
        console.log(`User: ${user.name} (${user.email})`);
    });
} catch (error) {
    console.log(error);
}
Generate types automatically
Use the indobase CLI to generate TypeScript interfaces automatically: indobase types ./types